How to Set Up Unit Testing for SitecoreAI Content SDK Next.js Projects
Posted on December 12, 2025 • 8 minutes • 1499 words
Table of contents
- 🏁 Introduction
- ⚙️ Prerequisites
- 🛠️ Tools & Libraries
- 📦 Package Installation
- ✍️ Writing Unit Tests
- ▶️ Running Tests
- Step 1: Validate Setup and Configuration
- Step 2: Running Individual Tests
- Step 3: Run Tests by Name Pattern
- Step 4: Run a Specific Test File with Coverage and Verbose Output
- Step 5: Run Tests by File Pattern with Coverage and Verbose Output
- Step 6: Run All Tests Once
- Step 7: Run Tests in Watch Mode
- Step 8: Run Tests Without Watch Mode and With Coverage (CI Mode)
- 📊 Test Coverage Reports
- 💡 Best Practices
- 🧭 Conclusion
- 🧾Credit/References
Unit testing plays a critical role in ensuring code quality, stability, and maintainability for modern headless CMS solutions. When working with SitecoreAI Content SDK Next.js applications, implementing a robust testing strategy is essential. This guide provides a comprehensive walkthrough for setting up unit testing in a SitecoreAI-powered Next.js project using Jest and React Testing Library. You’ll learn how to install the required dependencies, configure Jest for Next.js , and structure effective test cases for SitecoreAI components to achieve reliable and scalable applications. SitecoreAI
Before you begin setting up unit testing for SitecoreAI Content SDK Next.js applications, ensure your development environment is properly configured. Meeting these prerequisites will help you integrate Jest and React Testing Library seamlessly and avoid common setup issues.
You’ll need:
- Node.js (v14 or higher) for running Next.js and testing tools
- npm or Yarn as your package manager
- An existing SitecoreAI Content SDK Next.js project ready for testing
- Basic knowledge of React and TypeScript for writing and maintaining test cases
This setup leverages industry-standard tools for a robust testing stack:
- Jest: JavaScript testing framework
- React Testing Library: For React component testing
- TypeScript: For type-safe tests
- Jest DOM: Enhances DOM assertions for Sitecore component testing.
Step 1: Install Core Testing Dependencies
Navigate to your Sitecore Content SDK Next.js project directory and install the required packages:
cd xmcloud-starter-js/examples/kit-nextjs-article-starter
npm install --silent
npm ci --silent
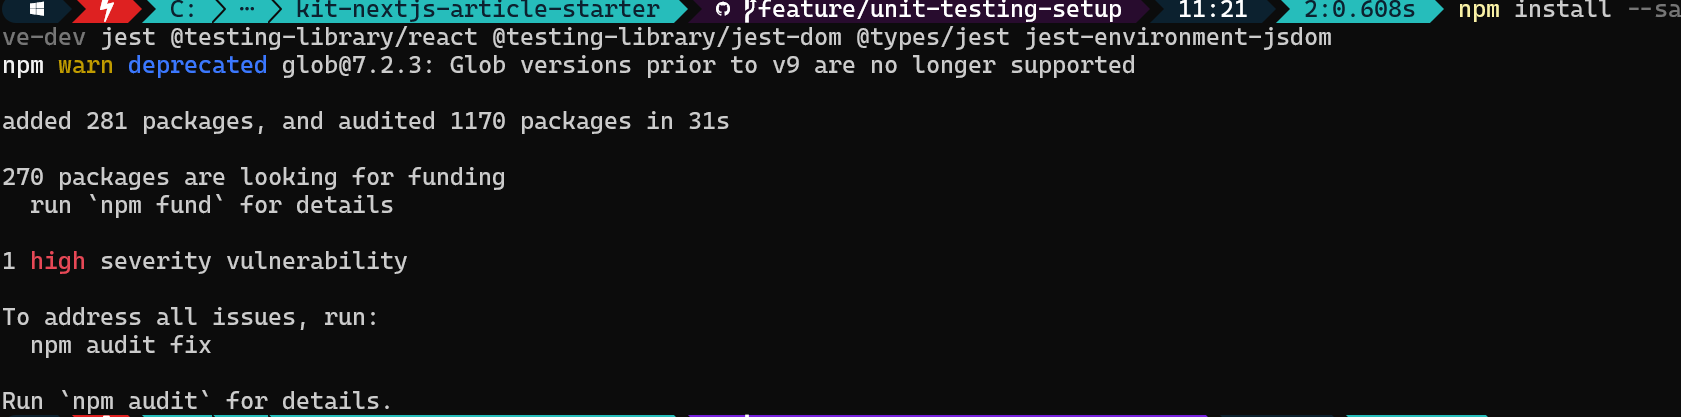
npm install --save-dev jest @testing-library/react @testing-library/jest-dom @types/jest jest-environment-jsdomOutput of the Command:
Step 2: Add TypeScript Support
For TypeScript-enabled Sitecore projects:
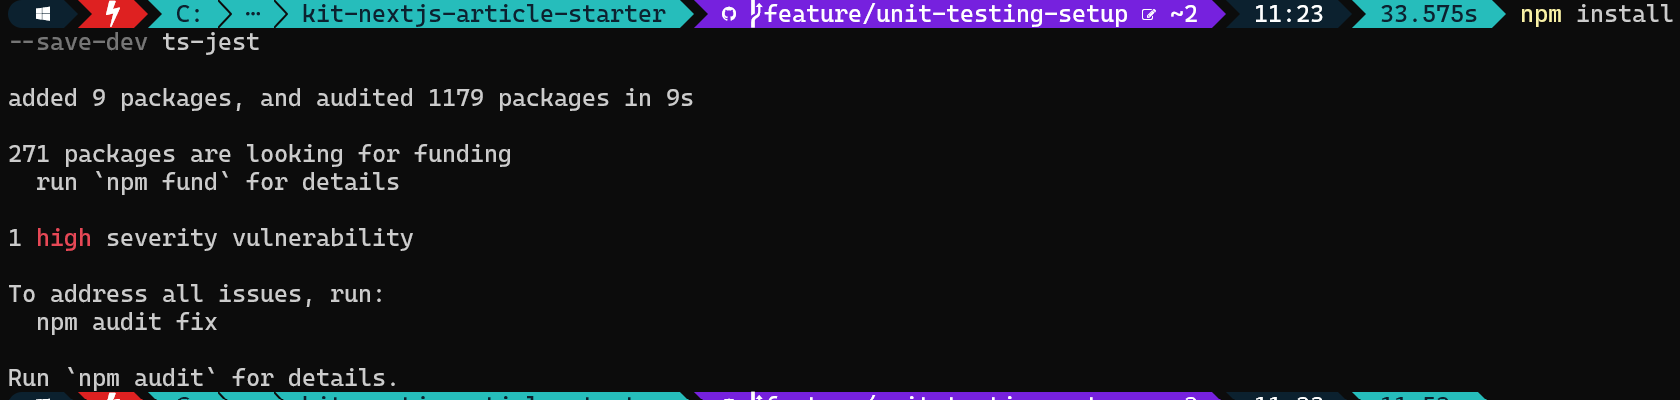
npm install --save-dev ts-jestOutput of the Command:
Confirm all core packages are installed correctly:
npm list --depth=0 | Select-String "jest|testing"Output of the Command:

Step 4: Create Jest Configuration
Create a jest.config.js file in your project root to handle Next.js integration and module mapping. This file loads your Next app, configures setupFilesAfterEnv, maps module aliases, and sets jest-environment-jsdom as the test environment.
Update jest.config.js to align with path aliases defined in tsconfig.json.
// jest.config.js file
const nextJest = require('next/jest');

const createJestConfig = nextJest({
  dir: './',
});

const customJestConfig = {
  setupFilesAfterEnv: ['<rootDir>/jest.setup.js'],
  moduleNameMapper: {
    '^@/(.*)$': '<rootDir>/src/$1',
    '^components/(.*)$': '<rootDir>/src/components/$1',
    '^shadcd/(.*)$': '<rootDir>/shadcn/$1',
    '^lib/(.*)$': '<rootDir>/src/lib/$1',
    '^temp/(.*)$': '<rootDir>/src/temp/$1',
    '^assets/(.*)$': '<rootDir>/src/assets/$1',
    '^enumerations/(.*)$': '<rootDir>/src/enumerations/$1',
    '^types/(.*)$': '<rootDir>/src/types/$1',
    '^graphql-types$': '<rootDir>/node_modules/@types/graphql-let/__generated__/__types__',
    '^react$': '<rootDir>/node_modules/react',
    '^@/tw/(.*)$': '<rootDir>/tailwind-config/$1',
  },
  testEnvironment: 'jest-environment-jsdom',
  testMatch: [
    '**/tests/**/*.(test|spec).(ts|tsx|js)',
    '**/__tests__/**/*.(test|spec).(ts|tsx|js)',
    '**/*.(test|spec).(ts|tsx|js)'
  ],
  testPathIgnorePatterns: ['<rootDir>/.next/', '<rootDir>/node_modules/'],
  collectCoverageFrom: ['src/**/*.{ts,tsx}', '!src/**/*.d.ts', '!src/**/*.stories.{ts,tsx}'],
};

module.exports = createJestConfig(customJestConfig);Create jest.setup.js in your project root to import Jest DOM matchers:
// jest.setup.js file

import '@testing-library/jest-dom';
Step 6: Update TypeScript Configuration
Add Jest types to your tsconfig.json:
// tsconfig.json file

{
  "compilerOptions": {
    // ... other options
    "types": ["node", "jest"]
  }
}
Step 7: Add Test Scripts to package.json
Update your package.json:
// package.json file

{
  "scripts": {
    "test": "jest",
    "test:watch": "jest --watch",
    "test:coverage": "jest --coverage",
    "test:ci": "jest --ci --coverage --watchAll=false"
  }
}
if below entry present then update with "test": "jest":
// package.json file

{
  "scripts": {
    "test": "echo 'No tests implemented yet' && exit 0",
  }
}Creating effective unit tests for SitecoreAI Content SDK Next.js components is key to ensuring your application performs reliably across different scenarios. Prioritize testing Sitecore-specific elements such as component fields and rendering variants.
Step 1: Create tests folder
Create a tests folder in your project root to store the unit test files.
Step 2: Create Test File for a SitecoreAI Next.js Component
Create a test file inside a tests/ folder, for example, examples\kit-nextjs-article-starter\tests\rich-text-block\RichTextBlock.test.tsx
Recommendations
The recommended structure uses a dedicated tests/ directory to prevent test files from being included in the component build.
Step 3: Key Testing Patterns
Mocking SitecoreAI Next.js Components
Since Sitecore Content SDK components like Link and NextImage are wrappers around native tags, they must be mocked to run outside a Sitecore/Next.js environment.
// Mock Sitecore Content SDK
jest.mock('@sitecore-content-sdk/nextjs', () => ({
  RichText: ({ field }: any) => (
    <div role="region" className="prose custom-style" data-component-name="rich-text-block" id="test-id">
      <div data-testid="rich-text">{field}</div>
    </div>
  ),
}));

// Mock NoDataFallback component
jest.mock('@/utils/NoDataFallback', () => ({
  NoDataFallback: () => <div data-testid="no-data">Rich text</div>,
}));

// Mock Sitecore SDK components
jest.mock('@sitecore-content-sdk/nextjs', () => ({
  Text: (props: any) => <span data-testid="text" {...props}>{props.field?.value}</span>,
  useSitecore: () => ({ page: { mode: { isEditing: false } } }),
}));

// Mock TextBanner variants (named export Default for each)
jest.mock('@/components/text-banner/TextBannerDefault.dev', () => ({
  Default: (props: any) => <div data-testid="text-banner-default">Default {props.isPageEditing ? 'editing' : 'view'}</div>,
}));
Creating Test Data Factories
Use functions to generate consistent mock data, making tests clean and easy to maintain.
// Helper to create mock props
const createMockProps = (overrides: any = {}) => ({
  params: {
    RenderingIdentifier: 'test-id',
    styles: 'custom-style',
    ...overrides.params,
  },
  fields: {
    Content: { value: '<p>Test Content</p>' },
    ...overrides.fields,
  },
});

// Usage
const props = createMockProps();
const props = createMockProps({
      fields: {
        Content: undefined, // Explicitly remove Content to trigger fallback
      },
    });
const props = createMockProps({
      params: { styles: 'mystyle', RenderingIdentifier: undefined },
});Step 1: Validate Setup and Configuration
Validate your Jest setup with npx jest --version and npx jest --showConfig before running individual or directory‑wide tests.
# Verify Jest installation and version
npx jest --version

# Run Jest configuration check
npx jest --showConfigRun specific tests for faster debugging:
# Run tests for the Hero component
npm test tests\components\hero\Hero.test.tsx
Information
This command runs only the tests in the Hero.test.tsx file. Use it to quickly check the Hero component’s functionality without running the entire test suite. Ideal for focused development and debugging.
Step 3: Run Tests by Name Pattern
# Run tests by name pattern
npx jest --testNamePattern="Hero"
Information
This command executes all tests whose names match the pattern Hero. It’s useful for running a subset of tests across multiple files, especially when you want to target tests related to a specific feature or component.
Step 4: Run a Specific Test File with Coverage and Verbose Output
npx jest tests\components\hero\Hero.test.tsx --coverage --verboseInformation
This command runs the Hero.test.tsx file, generates a detailed coverage report, and provides verbose output for each test. It’s perfect for ensuring your component is fully tested and for reviewing which lines of code are covered.
npm run test:coverage -- --testPathPattern=Hero --verbose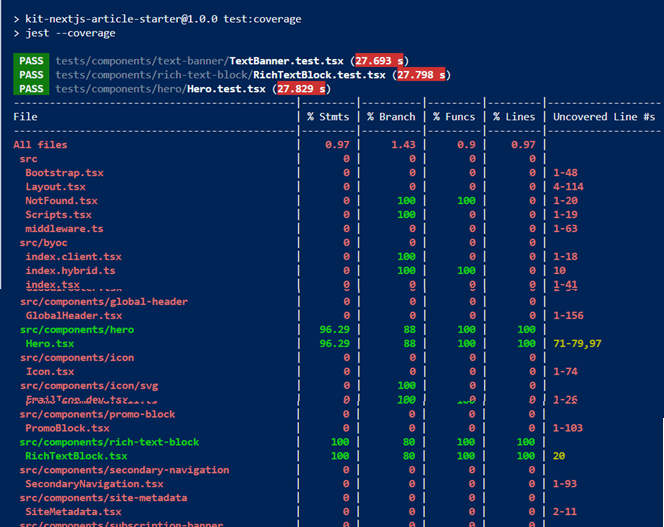
Information
This command runs all test files whose paths match Hero, generates a coverage report, and outputs detailed test results. It’s useful for validating all Hero-related tests and ensuring comprehensive coverage.
Step 6: Run All Tests Once
npm testInformation
This command runs the entire test suite once. Use it to validate your whole project before committing or deploying, ensuring that all components and features are working as expected.
Step 7: Run Tests in Watch Mode
npm run test:watchInformation
This command starts Jest in watch mode, automatically rerunning relevant tests when files change. It’s ideal for active development, providing instant feedback as you code.
npm run test:ciInformation
This command runs all tests once in continuous integration (CI) mode, generates a coverage report, and disables watch mode. It’s best for automated pipelines and pre-deployment checks, ensuring code quality and test completeness.
These commands help streamline your testing workflow, whether you’re developing locally, debugging a specific component, or running tests in a CI/CD pipeline. They also ensure you can easily view and improve your code coverage.
Step 1: Generate Coverage Reports
Generate detailed analysis of lines, functions, and branches:
npm run test:coverageInformation
This command runs all tests and generates a full code coverage report for your project. Use it to identify untested code and improve your test coverage metrics.
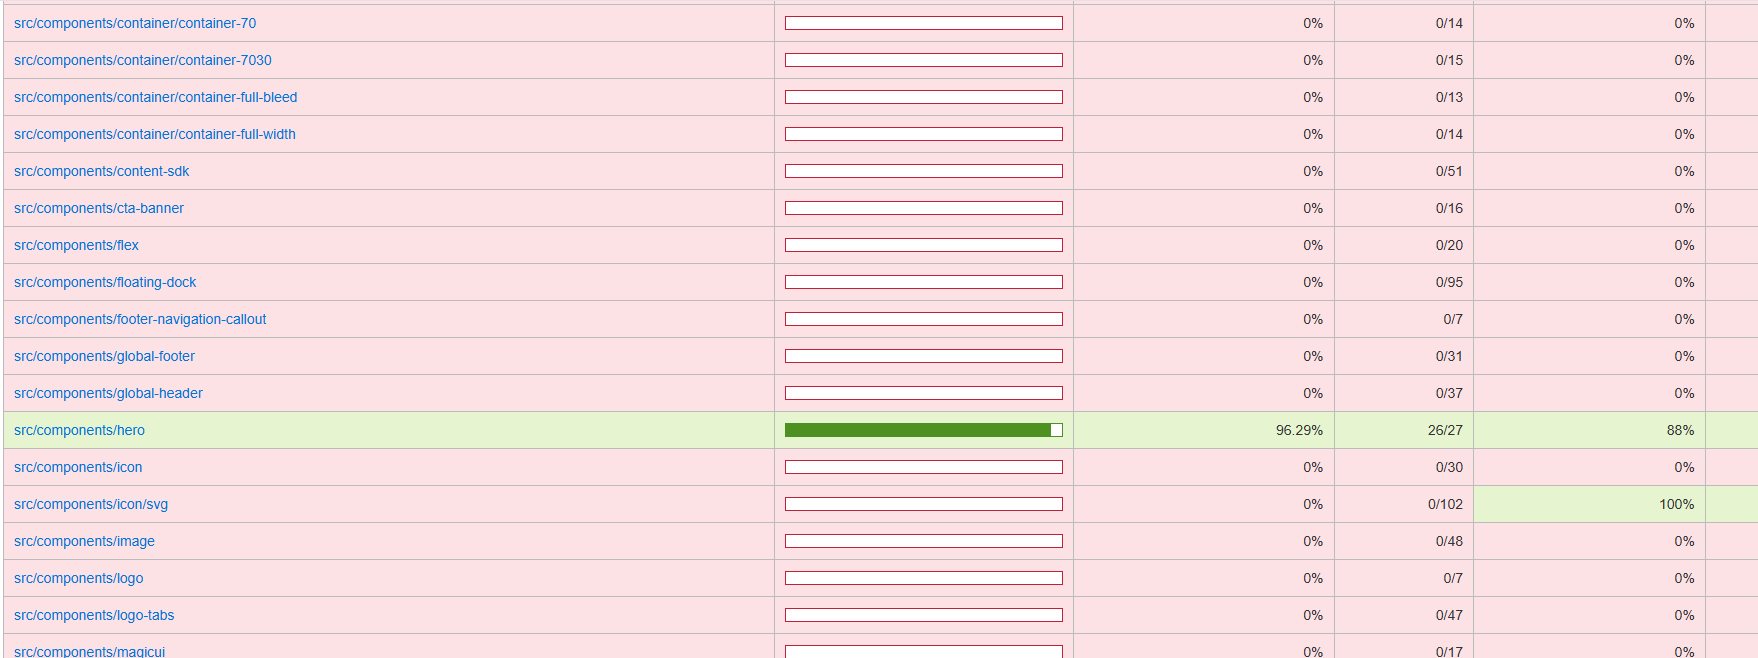
It will generate the report at \kit-nextjs-article-starter\coverage\lcov-report\index.html location:
✔ Testing Strategy
- Test behavior, not implementation
- Clear test names
- Use Arrange / Act / Assert
- Mock external APIs & Sitecore fields
✔ Component Testing Guidelines
- Test all component variants
- Cover empty or missing data cases
- Validate accessibility
- Confirm field mapping
✔ Organization
- Keep tests in a separate /tests folder
- Use factories for consistency
- Group related cases with describe()
Recommended File Structure
kit-nextjs-article-starter/
├── src/
│   └── components/   // Component source files
└── tests/
└── components/ // ✅ All test files go here (Isolated from build)You now have a fully configured, production-ready unit testing environment for SitecoreAI Content SDK Next.js applications. This setup delivers a solid foundation for comprehensive testing, enabling faster development cycles, improved code stability, seamless CI/CD integration, and enhanced developer experience - ensuring high-quality, scalable Sitecore implementations.
Enjoyed this guide? Give it a ⭐ and show your support!
Share Your Experience
For complete setup details and code samples, scan the QR code below 👇 to access the full GitHub repository and don’t forget to share your feedback.